| Pages:
1
2
3 |
Fleaker
International Hazard
    
Posts: 1252
Registered: 19-6-2005
Member Is Offline
Mood: nucleophilic
|
|
Ignaro:"
A search for "arc welder" microwave brings a lot of pages.
I like this: http://www.backyardmetalcasting.com/guest_timwelder.html "
Actually, the person who built that welder is a rather frequent contributor to this forum, perhaps you should U2U 12AX7 who designed that unit.
Also, I suggest you email Theodore Gray, he's a very nice person and a fellow science enthusiast; I'm sure he'd be glad to supply some details.
Making an arc furnace is a loosing endeavor without the proper refractory materials. Just using 1200C rated high insulating kiln brick, and after one
use you will notice the brick has fused together on the inside from the radiant heat. Tungsten or graphite electrodes can be used, regardless, they
will volatize and conduct the arc (gradually disappearing as they do). It's the radiant heat that melts the metal in most cases, not direct contact
and the metal to be melted is usually in some sort of cooled basin (copper typically IIRC) in an inert, reduced pressure atmosphere. I suggest you
look into magnesia or zircon as refractory to reflect the heat and keep from melting so much as a more simple mullite refractory would.
|
|
|
neutrino
International Hazard
    
Posts: 1583
Registered: 20-8-2004
Location: USA
Member Is Offline
Mood: oscillating
|
|
High vacuum melting on a piece of cooled copper? Are you sure you're not confusing this with e-beam melting?
I've never seen a DIY carbon arc furnace with an inert atmosphere and reduced pressure, although I guess I haven't looked that much. Still, it seems
beyond the ameteur's capabilities.
|
|
|
Fleaker
International Hazard
    
Posts: 1252
Registered: 19-6-2005
Member Is Offline
Mood: nucleophilic
|
|
Not entirely beyond the amateur's capabilities. My friend, nearly anything is possible with money. Check out Max Whitby's reduced pressure Ar, arc
furnace.
I might have it confused with e-beam melting (although I doubt it, e-beam melting is the epitome of refining, it is after all an upgrading step and
they would not introduce anything that could be dissolved, even soluble copper) I can always e-mail a few people and ask what type of basin they use.
|
|
|
Mr. Wizard
International Hazard
    
Posts: 1042
Registered: 30-3-2003
Member Is Offline
Mood: No Mood
|
|
Magpie, Funny how it happens when you are looking for something you see them all around you  A 1600 watt transformer sounds like a good one. Don't forget to save the diode(s), fan, capacitors, and the magnetron. The magnetron has
a big magnet in it. The thing about MOTs (MicroWave Oven Transformers) is they are wound for power, not for efficiency, as I understand it. Most
transformers used on the mains won't draw much current when their secondaries are not loaded, but MOTs don't generate enough counter EMF (voltage) in
their primaries to resist the line voltage, and thus draw a significant current even when not loaded. You might want to keep that fan to cool it down. A 1600 watt transformer sounds like a good one. Don't forget to save the diode(s), fan, capacitors, and the magnetron. The magnetron has
a big magnet in it. The thing about MOTs (MicroWave Oven Transformers) is they are wound for power, not for efficiency, as I understand it. Most
transformers used on the mains won't draw much current when their secondaries are not loaded, but MOTs don't generate enough counter EMF (voltage) in
their primaries to resist the line voltage, and thus draw a significant current even when not loaded. You might want to keep that fan to cool it down.
|
|
|
Magpie
lab constructor
    
Posts: 5939
Registered: 1-11-2003
Location: USA
Member Is Offline
Mood: Chemistry: the subtle science.
|
|
I have turned my kitchen into an electrical development laboratory, assuring my wife it will only be for a few days.  It's much warmer than the garage. It's much warmer than the garage.
I removed the transformer from the microwave oven. Then removed its secondary winding. It was an over-the-oven type so scavenged 2 pilot lights
(30w) also, the electrical cord, a little wiring, a large capacitor, and a dual squirrel cage fan. Thanks for the tip Mr Wizard, I'll go out to my
garbage can and get the magnetron and diodes too.
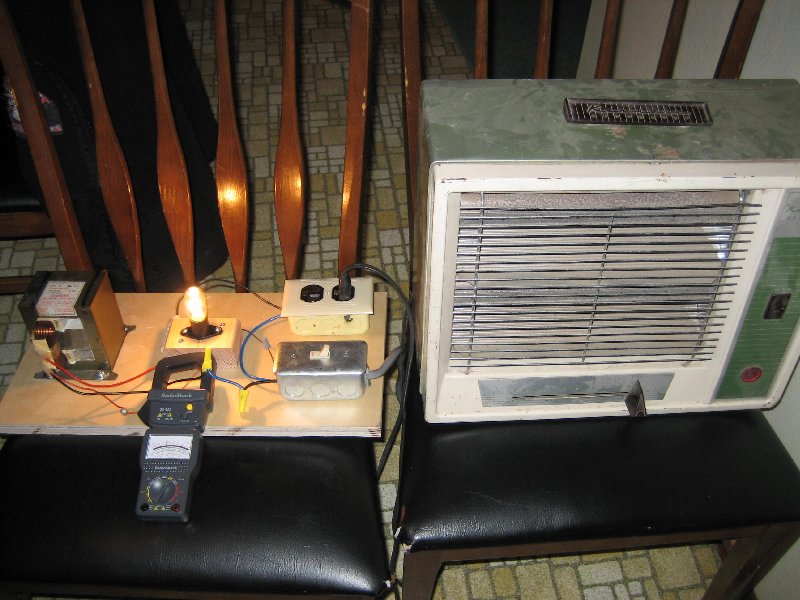
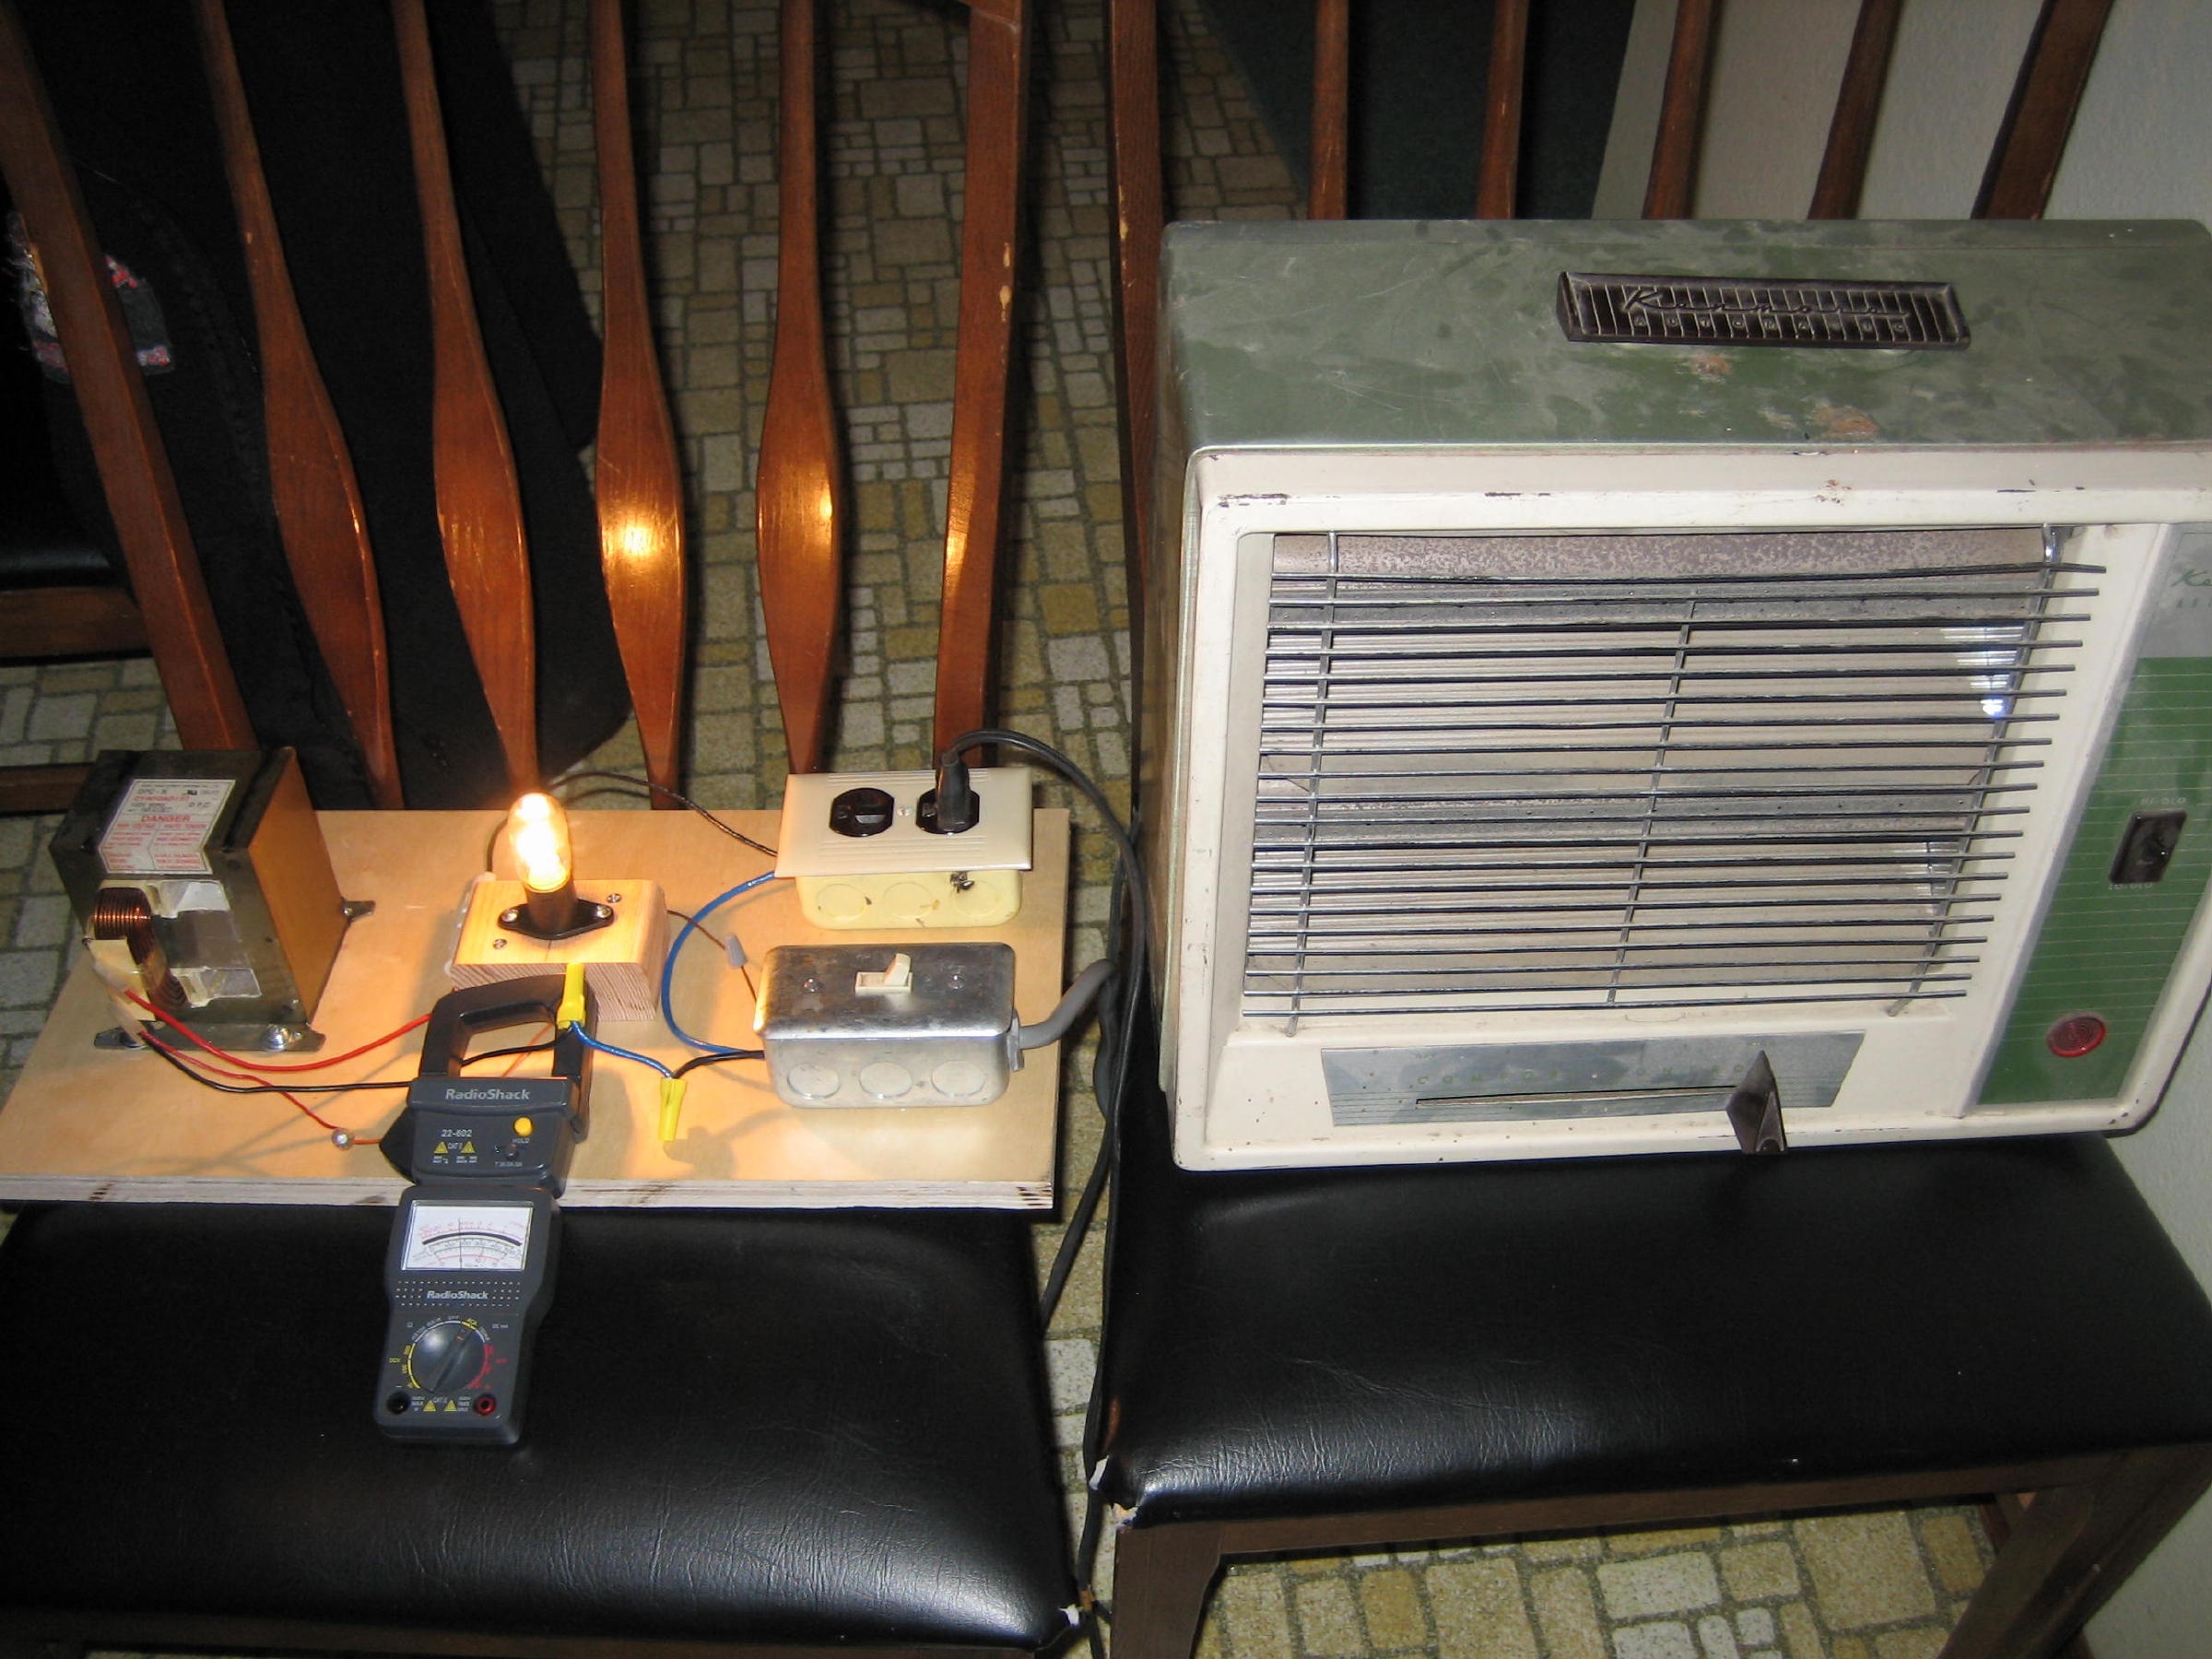
I assembled the parts on a piece of 5/8" plywood and began testing. First test was with a 75w incandescent lamp as load just to verify the circuit.
Light was dim which was a good sign. Then loaded it with a 1600w space heater. Amp draw was 5.5 amps vs a possible 13.3 without the inductor. So
far things are looking good. I will keep testing with loads of smaller resistance until I feel I can test a short circuit load. If the short circuit
test yields less than 10 amps I feel the power supply should be ready. I will post a picture of the set-up in my next post.
I understand that this arc furnace will be very hot. It will make my muffle furnace, which is limited to about 1200C, look like a wimp. I am looking
for appropriate refractory materials. So far the best I have found is 2800C firebrick and 3200C castable. I appreciate any leads on more appropriate
refractories.
I plan to use ~1/4" graphite electrodes and a graphite crucible of about 200 mL capacity. I realize that there will be consumption of these items,
especially the electrodes.
[Edited on 8-12-2005 by Magpie]
[Edited on 8-12-2005 by Magpie]
The single most important condition for a successful synthesis is good mixing - Nicodem
|
|
|
Magpie
lab constructor
    
Posts: 5939
Registered: 1-11-2003
Location: USA
Member Is Offline
Mood: Chemistry: the subtle science.
|
|
power supply test set-up
Reduced pic size. Chemoleo
[Edited on 28-11-2008 by chemoleo]
The single most important condition for a successful synthesis is good mixing - Nicodem
|
|
|
chemoleo
Biochemicus Energeticus
    
Posts: 3005
Registered: 23-7-2003
Location: England Germany
Member Is Offline
Mood: crystalline
|
|
A while ago, I ran 42 V @ 120 Amps through two 0.8 mm thick carbon electrodes, where the electrodes touched in a chamber of a 4 cm diameter, made of
cast firecement (you know the cement that is used to stick together a fireplace). I couldnt use this setup properly because after a few seconds only
the firecement melted into a white glowing mass. I was able to make some Calcium carbide that way, within a few few seconds run. At the time I
realised making a proper setup would be difficult, you need a remotely controlled setup to move the carbon electrodes forward, it's quite dangerous to
be that close to the arc. Then, a decent distance from the arc to the chamber is better, to avoid the problems described above.
The biggest problem, as I see it, are the electrodes, and their required steady movement. I'd use alumina-based fire brick/plates which you can buy
from hardware suppliers, and which are used to line ovens with. On my coal furnace, they glowed a happy white but did not crack. All you need to do
is to cut them into the right sized pieces, but and hold a square setup together with an outer layer of fire cement. Drill a hole into the brick for
the electrode, and devise some setup to move the electrodes smoothly. Then you are all ready to go!
Did anyone ever dig out how a professional carbon arc furnace is built?
Never Stop to Begin, and Never Begin to Stop...
Tolerance is good. But not with the intolerant! (Wilhelm Busch)
|
|
|
S.C. Wack
bibliomaster
    
Posts: 2419
Registered: 7-5-2004
Location: Cornworld, Central USA
Member Is Offline
Mood: Enhanced
|
|
FWIW, an illustration ("ELECTRIC FURNACES FOR THE 110-VOLT CIRCUIT"):
Attachment: jacs_20_769_1898.pdf (259kB)
This file has been downloaded 1301 times
|
|
|
12AX7
Post Harlot
    
Posts: 4803
Registered: 8-3-2005
Location: oscillating
Member Is Offline
Mood: informative
|
|
So you're using the MOT primary as a ballast inductor?
Cut off the welds holding the "I" segment on, then add a layer of thick plastic and add a C-clamp to hold it in place. The air gap will reduce
inductance. Varying gap (practical limit is about a half inch, beyond which you might as well just have the "I" seperate) varies inductance.
Measure the voltage across the space heater next time you run it. R = V/I gives a figure for its resistance. Kirchoff's rule says 120 -
VS = VL, and currents being equal you can calculate phase angle (and power factor) and reactance. Given a constant supply
frequency, you can thus establish the inductance of the inductor. Then graph L vs. gap for reference. 
Tim
|
|
|
12AX7
Post Harlot
    
Posts: 4803
Registered: 8-3-2005
Location: oscillating
Member Is Offline
Mood: informative
|
|
| Quote: | Originally posted by chemoleo
Did anyone ever dig out how a professional carbon arc furnace is built? |
Hum, I've walked past a small one before. Three 1" (or so) dia. graphite rods dropped into a refractory chamber. This was a direct-melting furnace,
three-phase (delta) powered obviously, probably for melting cast iron, steel and stainless steel (that's what the foundry pours).
Large direct-melting furnaces are the same idea, just bigger rods (a few *feet* in diameter..) and, I'd hate to think what the ballast inductors look
like. 
Indirect-arc furnaces usually use a rotating chamber, IIRC, so the radiation heats the walls and the charge makes contact with as much of the heated
surface as possible.
Limestone, dolomite and magnesite (magnesium carbonate, or make some yourself by precipitation) are suitable half-assed refractory materials. They
really do need to be fired to around 2000°C first but if you tolerate the mess you'll make of them, you can use it raw.
Tim
|
|
|
neutrino
International Hazard
    
Posts: 1583
Registered: 20-8-2004
Location: USA
Member Is Offline
Mood: oscillating
|
|
>...All you need to do is to cut them into the right sized pieces, but and hold a square setup together with an outer layer of fire cement. Drill a
hole into the brick for the electrode...
How hard is it do machine aluminum oxide? I know that this material is very hard (~9), so I imagine it wouldn't be so easy.
|
|
|
chemoleo
Biochemicus Energeticus
    
Posts: 3005
Registered: 23-7-2003
Location: England Germany
Member Is Offline
Mood: crystalline
|
|
Well the bricks I purchased are in fact quite crumbly, and break easily. Yet, using an angle cutter (is that the name?) it DID abuse the rotating disk
a fair bit.
But it's possible.
Never Stop to Begin, and Never Begin to Stop...
Tolerance is good. But not with the intolerant! (Wilhelm Busch)
|
|
|
Magpie
lab constructor
    
Posts: 5939
Registered: 1-11-2003
Location: USA
Member Is Offline
Mood: Chemistry: the subtle science.
|
|
more testing
I had more fun today with my test set-up. To get the final 1.1 ohms resistive load I had to place every heating device I could get my hands on into a
parallel array. It is a good thing my wife was away at work. What is beautiful to a madscientist can be overwhelming to most others. 
My method was to measure the resistance load, R, cold with an ohmmeter. Then turn on the power and measure the resulting amp draw, I. The impedance,
Z, was then calculated as Z= E/I, with E being 120v. The inductive reactance, XL, was then calculated as XL = [(Z^2)-(R^2)]^0.5. Inductance, L, was
calculated from L= XL/(2*pi*f) with f= 60Hz.
The data are as follows. In each case the current value was measured quickly before the resistance items had time to heat up (no lamps were
involved).
R, ohms-------I, amps-------- L, henrys (calculated)
5.0-------------5.5--------------0.056
3.3-------------6.8--------------0.046
2.5-------------8.5--------------0.037
1.1------------10.0------------- 0.032
Plotting R vs L yields a fairly straight line. Extrapolating this line I estimate my short circuit current will be 13.8 amps. This may or may not
blow the microwave fuse I have in the circuit. My guess is that it won't as to meet the nameplate 1600w it would have to draw 13.3 amps.
I find it interesting that the inductance, L, drops off with increasing current. I didn't expect this. Maybe it is due to "core saturation?"
Perhaps somone who is better versed in this phenomenon can tell me.
[Edited on 9-12-2005 by Magpie]
[Edited on 9-12-2005 by Magpie]
The single most important condition for a successful synthesis is good mixing - Nicodem
|
|
|
12AX7
Post Harlot
    
Posts: 4803
Registered: 8-3-2005
Location: oscillating
Member Is Offline
Mood: informative
|
|
It certainly could be. Saturation usually approaches suddenly, though. I would expect something like "50mH ... 49mH ... 47 ... 44 ... 25 ... 10mH",
where L starts dropping significantly only above a certain value.
For low currents, L will also be lower, due to initial permeability. Starting at 5A you should be well out of that region though.
If you have the equipment, it's a lot easier to observe the properties of an inductor by pulsing a constant voltage across it. It starts to draw
current according to the equation V/L = dI/dt. V and L being constant initially, it increases at a constant rate. In nice materials (last night, I
was testing ferrite cored inductors), it stays constant until it saturates, at which point current curves up and starts rising faster. In iron cores,
it starts low, goes up pretty smoothly, and then saturates.
Since you then have energy stored in the inductor, you have to release it. Most times you use a diode to direct the energy into a capacitor, where
the power is burned off by a resistor inbetween cycles (since you'd be operating this continuously to get a repeating, viewable waveform, energy
pulses over time equals power).
Last night, I was testing a ferrite core to see if I can get enough inductance and current capacity. You can increase saturation by adding air gap.
I went from about 250AT to 750AT with about 3/32" gap (I measure 2.5mm), reducing inductance from 0.25 to 0.1 microhenries per turn squared.
Tim
|
|
|
Magpie
lab constructor
    
Posts: 5939
Registered: 1-11-2003
Location: USA
Member Is Offline
Mood: Chemistry: the subtle science.
|
|
Thanks 12AX7 for the insight on core saturation and permeability. That is interesting stuff that I hope to take the time to understand better
someday. I don't have much for electrical test equipment other that a Heathkit volt-ohm meter and a RadioSchack clamp-on ammeter. Someday I hope to
pick up a cheap oscilloscope on eBay.
Also thanks to S. C. Wack for posting the old reference. Without these old references (I have 3 now) I wouldn't know where to start in building a
home arc furnace. Yours will be especially valuable when I get to "furnace design."
I obtained two more test points today, i.e.:
R, ohms---------I, amps-----------L, henrys (calculated)
0.7---------------12.0---------------0.0265
0.0---------------12.4---------------0.0256
I now feel that the power supply testing is complete and satisfactory.
I purchased the hardware needed for an arc test stand today. I will use 5/16" carbon gouging rod as electrodes. I also purchased a welder's helmet
($20) so that I can look at the arc. 
The single most important condition for a successful synthesis is good mixing - Nicodem
|
|
|
S.C. Wack
bibliomaster
    
Posts: 2419
Registered: 7-5-2004
Location: Cornworld, Central USA
Member Is Offline
Mood: Enhanced
|
|
2 like articles from JCE - 9, 148 (1932) and 14, 492 (1937):
http://rapidshare.de/files/8963508/jce.pdf.html
|
|
|
Magpie
lab constructor
    
Posts: 5939
Registered: 1-11-2003
Location: USA
Member Is Offline
Mood: Chemistry: the subtle science.
|
|
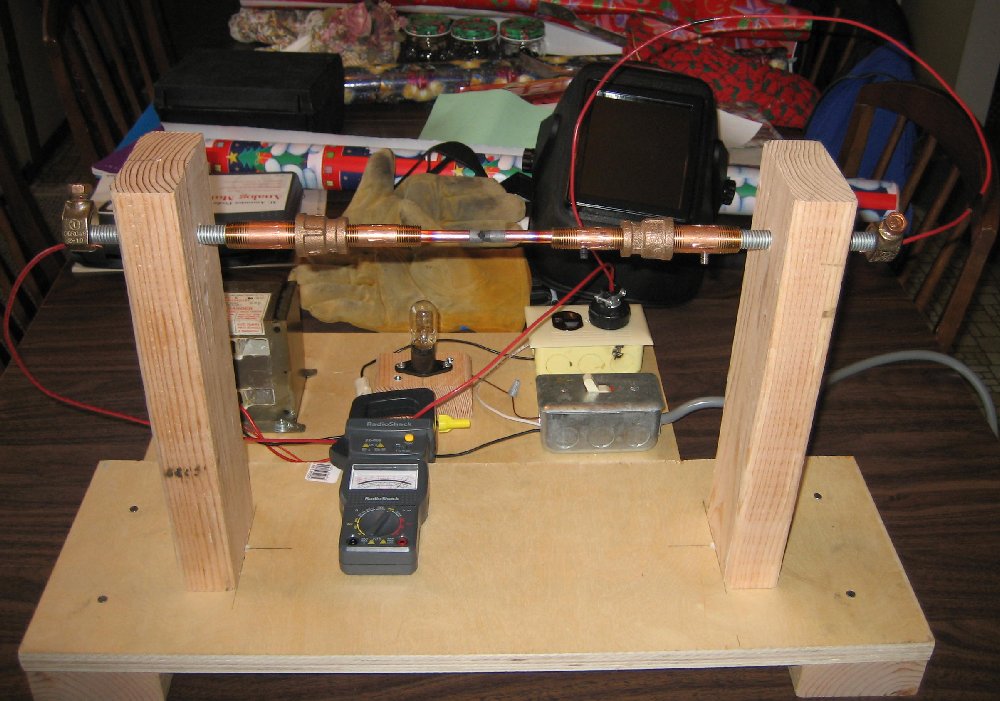
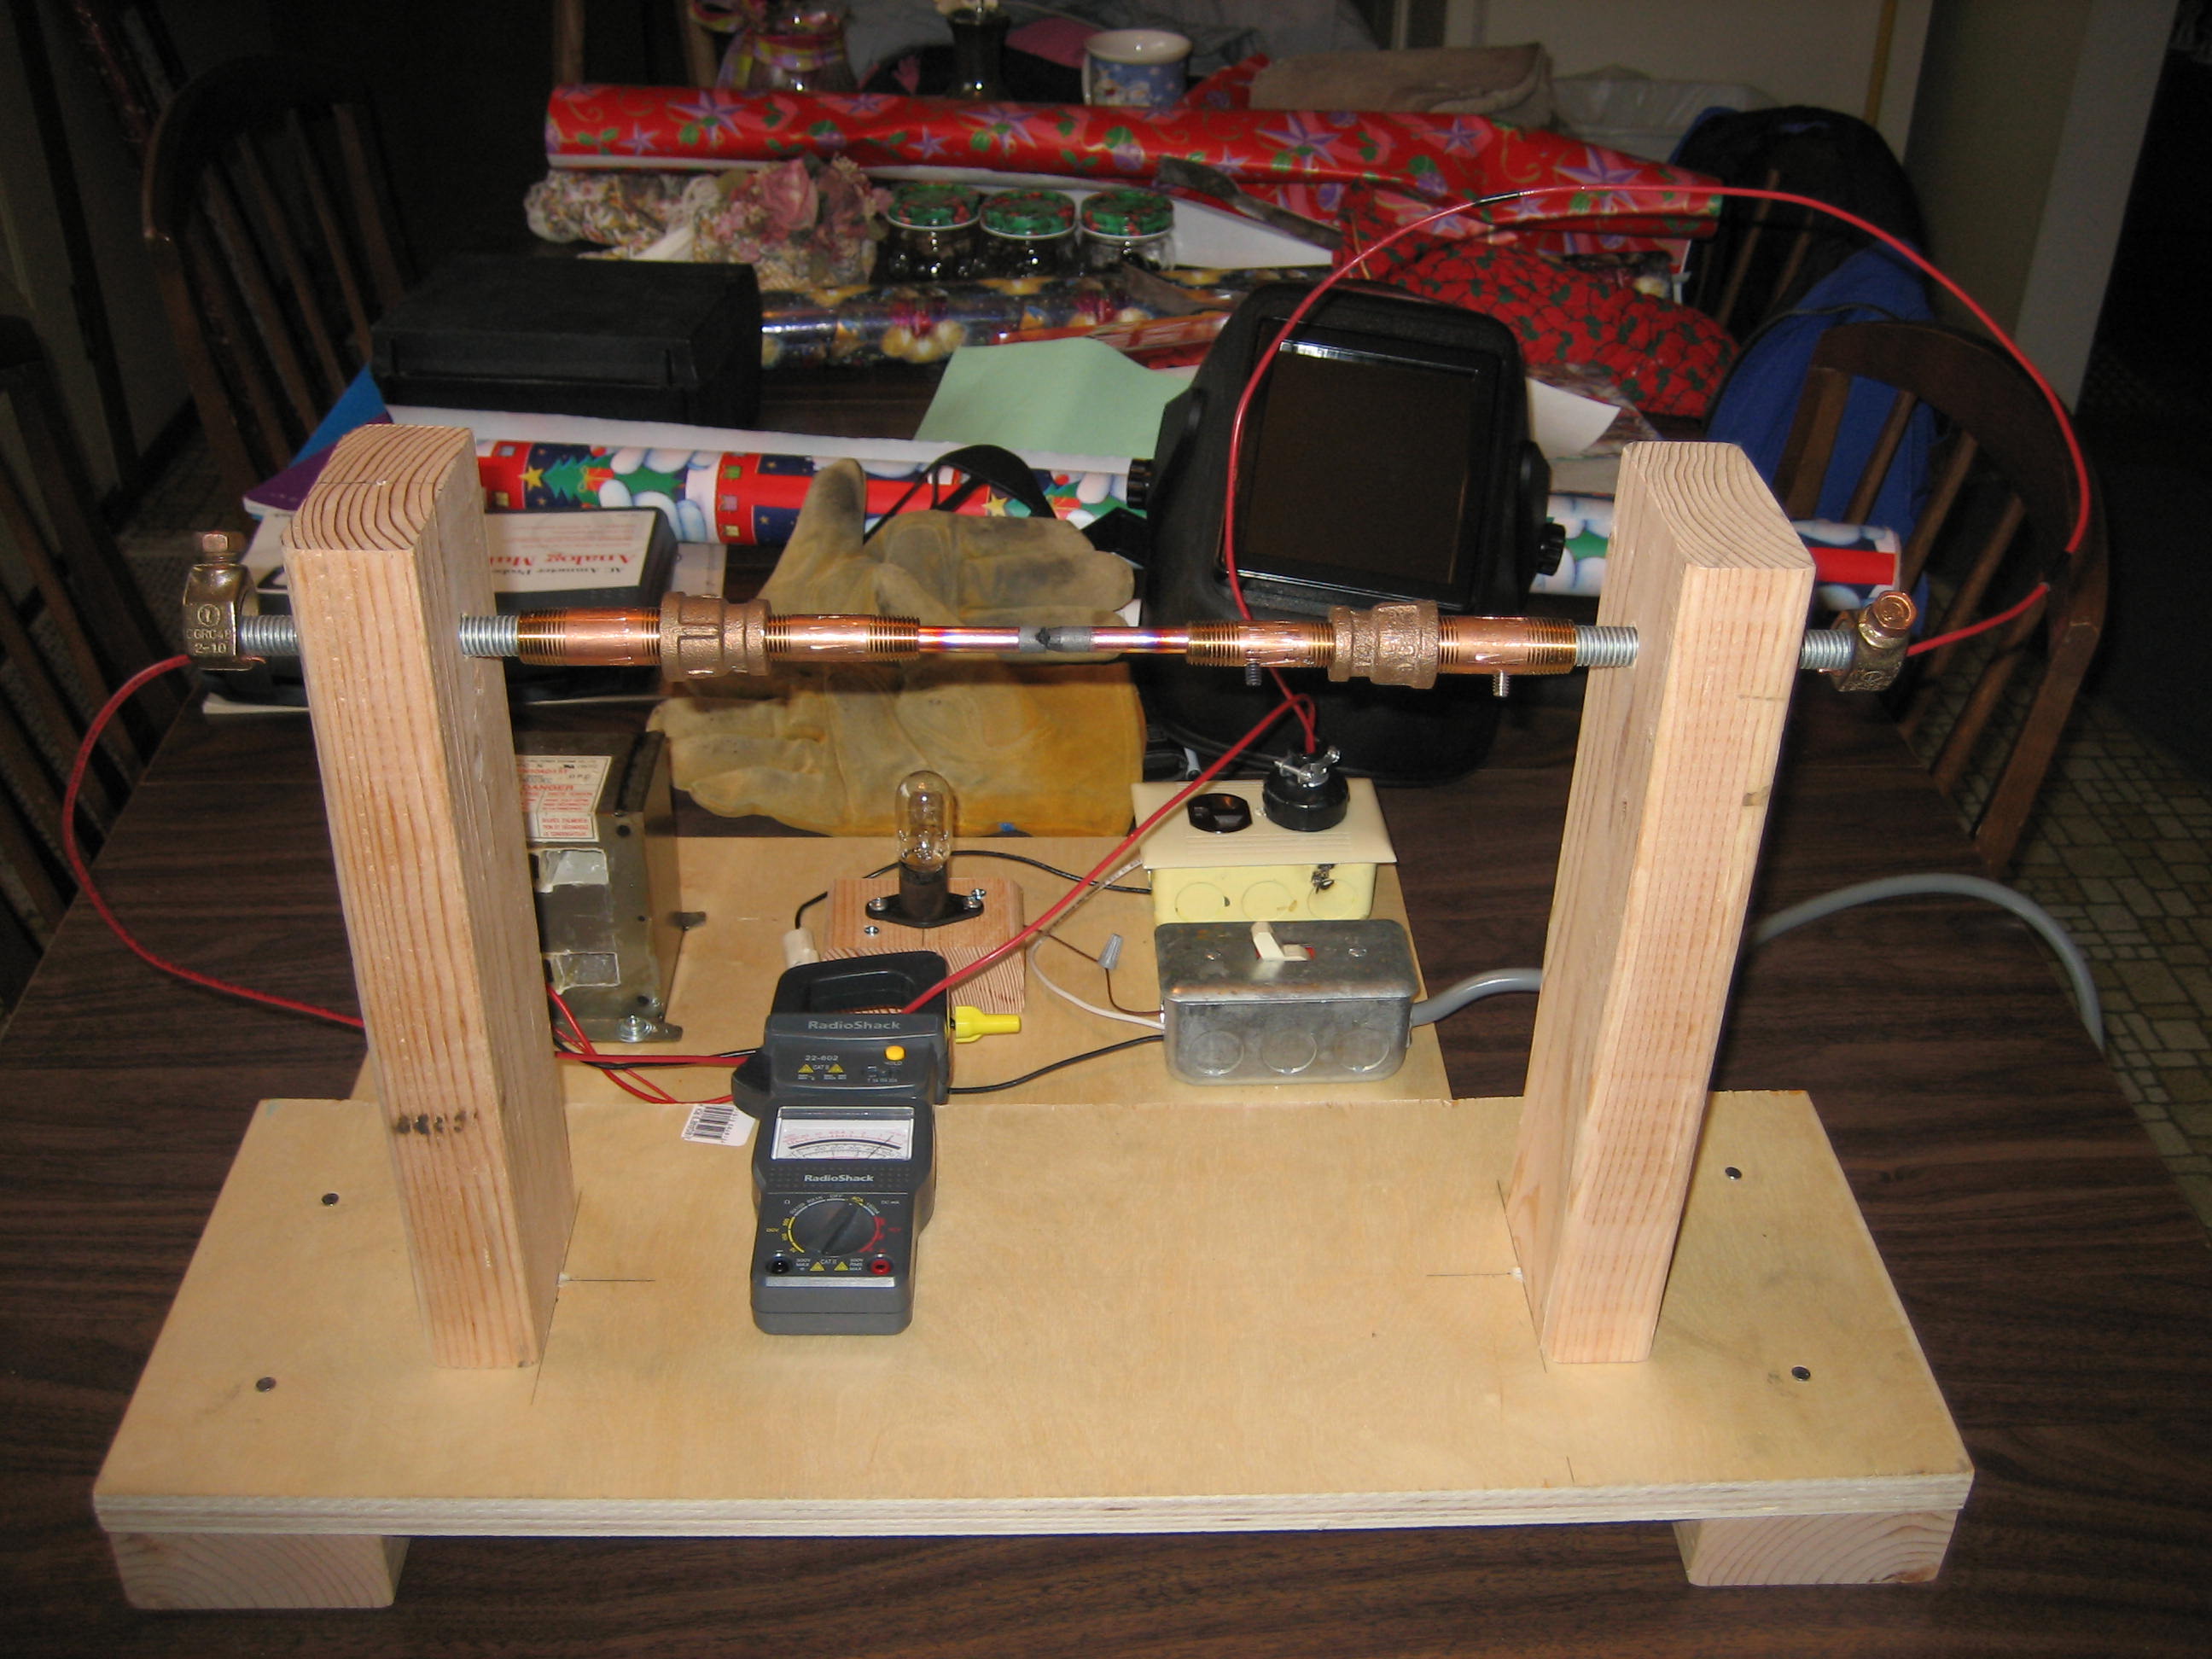
Did my first arc testing today with the 5/16" (8mm) graphite gouging rods. I did the first test outside (T=0C). I couldn't get a sustainable arc,
even with a minimal gap. So I brought everything inside, let it warm up, then tried it again. This time I was able to get a sustainable arc using a
minimal gap. The current was 13.7 amp. Then I sharpened the rods with a pencil sharpener to about a 3mm diameter point. I seemed to get a better
looking arc here but it was not sustainable. These results were disappointing as I expected a decent sized, sustainable arc, using a gap at least as
wide as 3mm. Please critque this experiment as you see fit.
Perhaps this does not indicate failure for my ultimate purpose which is to heat various carbon containing dry powders to temperatures in the 1600C -
3000C range in a properly designed furnace. I suppose it will depend on the conductivity of the powder and how well the furnace is insulated.
Shown below is a picture of the arc test stand:
[Edited on 28-11-2008 by chemoleo]
The single most important condition for a successful synthesis is good mixing - Nicodem
|
|
|
chemoleo
Biochemicus Energeticus
    
Posts: 3005
Registered: 23-7-2003
Location: England Germany
Member Is Offline
Mood: crystalline
|
|
Very nice, I suppose you move the electrodes forward by threading it through the wood?
Also, I don't know what voltage you used, but 13.4 Amp sounds like WAY too little. The arc I described above had 120 Amps at 42 V. I am not suggesting
you need that much, but 13.4 Amps does not sound sufficient to me.
Also, is that guy in the link above not using 6 or eight microwave transformers (modified) in parallel?
Attached are the designs on an image electric furnace - they use mirrors to focus the light. That way they melt ZrO2, MgO and Cr2O3 
Slightly more sophisticated. However it might give you some design ideas.
[Edited on 12-12-2005 by chemoleo]
Attachment: carbon arc furnace.pdf (864kB)
This file has been downloaded 1566 times
Never Stop to Begin, and Never Begin to Stop...
Tolerance is good. But not with the intolerant! (Wilhelm Busch)
|
|
|
Magpie
lab constructor
    
Posts: 5939
Registered: 1-11-2003
Location: USA
Member Is Offline
Mood: Chemistry: the subtle science.
|
|
Chemoleo:
I don't know if it is amps I'm looking for or just power. Power I would think.
You delivered (120a)(42v)=5040w! That's a lot of power. If I'm drawing 13.7amps this means my gap resistance is next to 0 according to my earlier
power supply testing data. With a gap resistance of next to zero I'm not producing much power. It is a very weak arc. For me to draw 5040w using
120VAC line voltage I would have to install a 50 amp breaker and use #6 wire. I would have to beef up the whole system for that kind of current.
What kind of power supply and electrodes were you using for your production of calcium carbide?
I haven't been able to access those last S.C. Wack references as I don't have access to RapidShare, even on the free basis. I must be on a proxy
server? I can get reprints on an inter-library loan, however.
Yes, my safety equipment is visible in the picture (welder's helmet & leather gloves). I have to change the gap while the system is "live" by
pulling or pushing one electrode and with helmet on. I do this with gloves on and a wooden handled bar-b-que tong. Crude but effective.
I first thought I would mount a nut on the wood and turn the "all-thread" through that for exact gap setting. Then I realized that not only was that
not necessary for this preliminary testing but is tough to do with a wire attached. 
The single most important condition for a successful synthesis is good mixing - Nicodem
|
|
|
chemoleo
Biochemicus Energeticus
    
Posts: 3005
Registered: 23-7-2003
Location: England Germany
Member Is Offline
Mood: crystalline
|
|
Indeed, I do think you need several kW, at high Amps. No, high voltage does not equal high amps here, you want the number of electrons, not the
'speed' of them, as it were!
The arc is made by ionised air/carbon/CO/CO2, not by voltage bridging!
My powerlines were very thick, deliberately, to minimise resistance. As in about 10 cables of the type you showed in your pictures, twisted together -
so as to make sure the most resistance is encountered where the electrodes meet. The setup to me looks like you are rather heating the wires than the
electrode.
I used the same electrodes as you, about 20 cm long/8 mm thick and Cu coated for better conductance. THe supply - well it was an industrial
transformer that I scavenged at a company where I once worked. It weighs roughly 20 kg - very heavy. Still it became quite warm during my treatment -
I suppose I should have put in some current limiters. Another problem of the supply was that it gave an impulse onto the mains when switched off,
which resulted in the house fuse being switched too - so every operation needed the house fuse to be turned on again. I think I discussed that
elsewhere, can't remember if we solved the problem or not.
Apart from that, once you got a better powersupply (there is unfortunately no way around it I think), I really suggest you do this in some sort of
crucible. Once it gets going you'll see what I mean - it is awesomely hot and dangerous, you want it at least partially covered!And I can almost
guarantee you, you will be too scared to move the carbon electrodes by threading them through, you'll be much too close to the arc.
I uploaded SCWacks references (which are good, similar in fact to the design I did ) to megaupload. I know the trouble with rapidshare, I also have it
with certian files. And proxies hardly ever work for me :-/
http://www.megaupload.com/?d=021WD6GQ
PS I just noticed I wrote 0.8 mm in one of the posts above, it was meant to be 0.8 cm, or 8 mm of course! 0.8 mm could never hold that much power!
[Edited on 13-12-2005 by chemoleo]
Never Stop to Begin, and Never Begin to Stop...
Tolerance is good. But not with the intolerant! (Wilhelm Busch)
|
|
|
Magpie
lab constructor
    
Posts: 5939
Registered: 1-11-2003
Location: USA
Member Is Offline
Mood: Chemistry: the subtle science.
|
|
This is a very interesting problem. The more articles I read the less clear it is to me exactly how to proceed. But I'm going to keep reading.
I was bothered by the fact that I had no guidance on what the power should be for a desired temperature. So I did calculations for a simplified
model using the following assumptions (my apologies for the barbaric units):
furnace geometry: spherical with radius, R2 = 6 inches
crucible spherical cavity radius, R1: 2 inches
cavity wall temperature, T1: 1600C
outside surface temperature, T2: 80C
insulating material conductivity, k: 2 BTU/(hr-ft-F)
design equation: Q= 4*pi*k(T2-T1)[1/(1/R2-1/R1)]
With these assumptions, Q = 5037w
This is remarkably close to what chemoleo had used.
For a 3000C furnace the power required would be 9345w.
Note: I realize that a basketball sized furnace would have a tough time radiating 5200w with a surface temperature of 40C.
Edit 1: I have just discovered the mother lode of electric furnace information: ignaro's 10/25/04 reference, i.e., "The Electric Furnace," 1914, by
Alfred Stansfield of McGill
University. This reference has everything including power requirements.
Edit 2: Corrected design equation and used a more realistic surface temperature of 80C and conductivity.
[Edited on 14-12-2005 by Magpie]
[Edited on 14-12-2005 by Magpie]
The single most important condition for a successful synthesis is good mixing - Nicodem
|
|
|
Magpie
lab constructor
    
Posts: 5939
Registered: 1-11-2003
Location: USA
Member Is Offline
Mood: Chemistry: the subtle science.
|
|
With a cursory read of Stanfield I believe I now see how to construct an electric furnace for both production of calcium carbide and other metals via
carbon reduction.
In summary, this is what I've learned:
1. It is power that is required to reach the desired temperature.
2. A minimal voltage of 40VAC is required to sustain an arc in air.
3. Because of the very low resistance of the arc, or carbonaceous mineral matrix, it is necessary to use very high currents to get the necessary
power delivery. [If you play around with the equations P = (I^2)R and P = (E^2)/R you'll understand.]
4. An AC stick welder, specifically the Lincoln AC-225C, looks like the ideal power supply from the standpoint of control, current capacity, and
cost. It is capable of supplying about 10kw at currents up to 225 amps. (My household mains circuit breaker is rated at 22kw.)
The single most important condition for a successful synthesis is good mixing - Nicodem
|
|
|
chemoleo
Biochemicus Energeticus
    
Posts: 3005
Registered: 23-7-2003
Location: England Germany
Member Is Offline
Mood: crystalline
|
|
Yes I fully agree, this is why I put the development of my own furnace on ice, due to control issues.
I'd really just get an arc welder, the cheap ones aren't even that expensive (soemthing like 80 euros they used to be). You'll have everytthing in a
box, and then can finally make some beloved CaC2!
Believe me, once you take your sample and you drop a few solid chunks (tiny!) into water, and bubbles that burn with a pop, you'll be wondering why
you bothered with MOTs and all - when it can be done so easily!
The difficult issue will be the crucible design, and steady movement of the electrodes....
Never Stop to Begin, and Never Begin to Stop...
Tolerance is good. But not with the intolerant! (Wilhelm Busch)
|
|
|
Dodoman
Hazard to Self
 
Posts: 79
Registered: 2-8-2004
Member Is Offline
Mood: No Mood
|
|
I want to build my own vacuum arc furnace so I came up with a design but I need some opinions.
I think the diagram is very explanatory. I have a few doubts though. Will my cooling system work effectively ? Where and how do I place the second
electrode so that I'm able to move them closer and even stir them if I need to? I think if the 2nd electrode was a right angle I could move it farther
and closer to the first by rotating the rode. How do I seal the cover do I just use heavy grease and count on the vacuum to seal it? Any thoughts
would be very helpful and much appreciated.
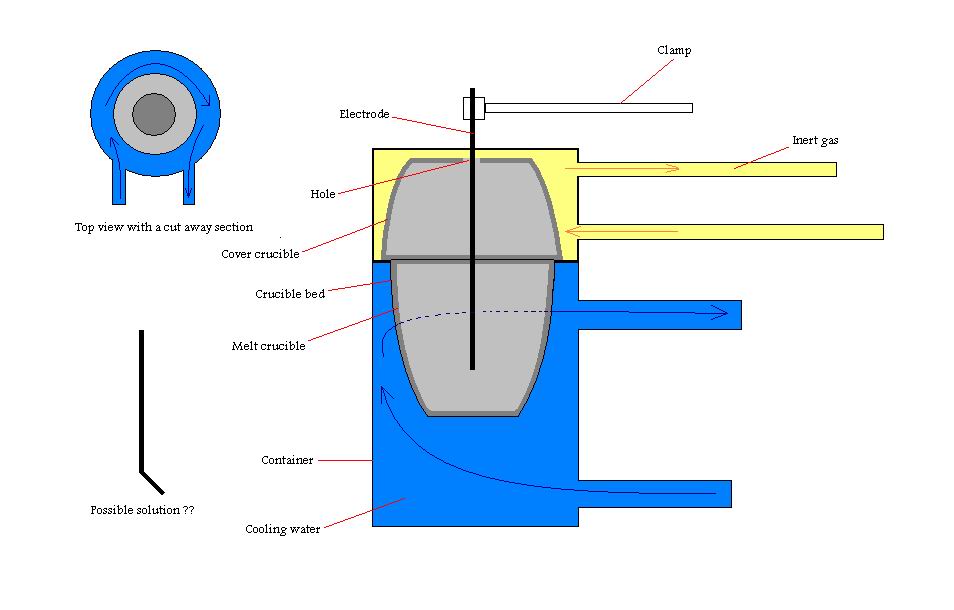
|
|
|
Magpie
lab constructor
    
Posts: 5939
Registered: 1-11-2003
Location: USA
Member Is Offline
Mood: Chemistry: the subtle science.
|
|
Interesting design Dodoman.
1. Read the Stansfield book I reference above if you haven't already. It is a wealth of information and ideas.
2. Why do you need a vacuum? If this wasn't required you could just run in the inert gas as a purge without worrying about perfect seals.
3. Telescopic seals are a possibility for moving electrodes.
4. Can the crucible itself be the 2nd electrode? Some designs use this (see Stansfield).
Your design is close to what I've been contemplating. I have put this project aside until I can justify buying an AC stick welder for a power supply.
[Edited on 19-1-2006 by Magpie]
The single most important condition for a successful synthesis is good mixing - Nicodem
|
|
|
| Pages:
1
2
3 |